 |
James is my 1998 BMW Cruiser Rig. He's taken us on many a fun ride. This is the story of building this most perfect beast |
Meet James
(Building the perfect beast)
November 2001
|
James is my 1998 BMW Cruiser Rig. He's taken us on many a fun ride. This is the story of building this most perfect beast |
What can I say, I like sidecars. It doesn’t seem to matter what kind or size of bike I’ve had over the years, I’ve either put a sidecar on it or at least thought about. After spending a few years riding a ’66 R50 BMW with Steib (trying in vain to keep up with the traffic or at least keep out of their way) it was time for a change, a new outfit. This time one that could keep up with traffic and carry the whole family.
A search began. After a lot of searching on the Web and pouring over as much text as I could find at the local library, three options of sidecars were separated from the field. These choices were: Watsonion, California Sidecars (Friendship 3) and the Champion Daytona 2+2. With no one in the local area to show us any of the sidecars, a road trip to Colorado Springs netted us a look at both the Friendship 3 as well as the Champion Daytona 2+2. The fit and finish of the Friendship 3 was very attractive but lost out to the Champion’s taller windshield. A decision was made.
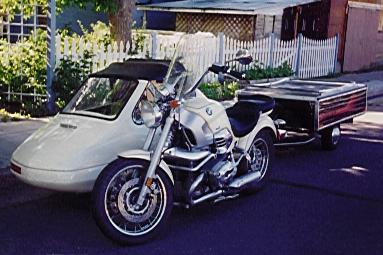
With a choice made to go with the Champion sidecar, a suitable tug would now be required. None of us (the family) were very happy with the offerings at the local shops. The whole family had to agree or it just wouldn’t be worthwhile, the search continued. Seems the one new motorcycle we kept coming back to was the BMW R1200c. I was a little concerned at first to make such a big purchasing decision but after a family discussion, I received the royal nod. A trip to the BMW store with checkbook in hand netted us one BMW R1200c in Ivory. With the sidecar ordered and motorcycle bought, preparations could begin.
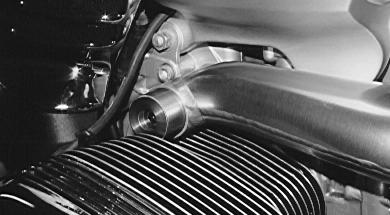
Having just seen the movie “Tomorrow Never Dies” my daughter thought naming our new bike “James Bond” was in order. After a bit of tossing back and forth, we settled on “James.” Seeing as how James was only the second year of production for this model, no one could offer mounts or suggestions on how to mount a sidecar to it. I spent a lot of time looking, measuring, taking photos and drawing. The fabrication could now go tentatively forward. The first mount to be made was the upper rear, as it seemed to be the most obvious.
 |
Assembled rear mount. Even the clevis bolt was made for this express purpose |
Two flat plates of ¼” steel were fabricated to suit the two rear foot peg mounts. These two plates were then lightly manipulated to allow for a piece of pipe to be welded in between. A triangle section was then formed from the same tube (1/2” schedule 80 pipe) and welded in place. This triangle was then crowned with a round piece of steel suitably turned to suit the upper sidecar mounting eyebolt.
Not yet having the sidecar to measure from there wasn’t too much (in the mount making department) I could do to prepare. The next step I felt I could take was to make the front upper mount. This mount proved a little more difficult to design, as there was little to no frame to use. I tried to get ideas from the professional sidecar people. Boy was that a mistake! Their way to deal with me was to ignore me, or tell me they had no idea, or (this was their favorite) tell me I had bought the wrong sidecar and if I would now buy their sidecar, they would happily fabricate suitable mounts. This last option I found to be slightly less than helpful.
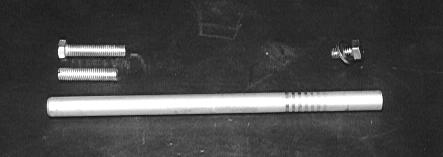 |
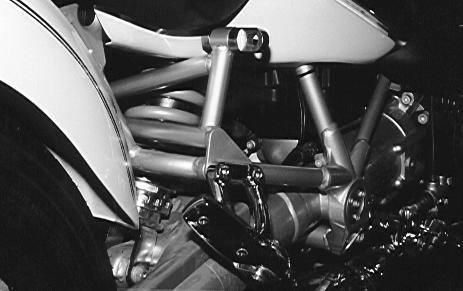
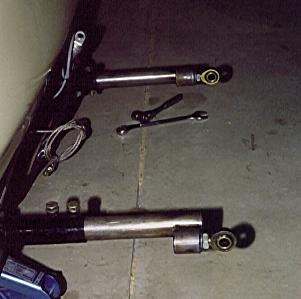
Working on ideas, the long shaft is the front swing arm axle. The bolt at upper right is the one BMW had Loctited in. The threaded fasteners at left are ideas taking shape. |
The idea that I kept coming back to was to mount off both sides of the front swing arm. To try this, I ordered a new front swing arm axle to experiment with. When the new front swing arm axle arrived, it differed from the original, in that instead of only having one end threaded, both ends were threaded. Considering that my intent was to turn and thread the “other” end anyway, this new one supplied less work. I did, although, have to remove a bolt in that same “other” end that BMW was nice enough to have Loctited in. By applying a little heat to soften the Loctite, the bolt could then be removed. The new and old axles were then exchanged. Because of the design of the front Tele-lever system, all the weight had to be removed from the forks before the old swing arm axle could be removed. A small hydraulic jack under the engine worked just fine. Once the replacement axle was in place, new, longer bolts were procured from Ace Hardware to suit the “yet to be made” attachment pieces.
 |
Of the right side attachment pieces, this is the inner one. The two threaded holes are to allow bolts to be threaded in so the piece could be pulled out. |
The attachment pieces for the frame had to be made first. To do this I turned a piece of steel to suit the dimensions of the inside of the swing arm, leaving enough length to suit attaching frame mount tube. The left side could be made one piece where as the right side (because of restricted space) had to be made in two pieces.
 |
Of the right side attachment pieces, this is the outer one, the frame tubing or pipe will be attached to this. |
With the attachments bolted up, piecing together the framework started. The framework was fabricated from ¾” schedule 80 pipe with “weld fittings”. The left side was the easier fitting to work with so that’s where I started. Everything was tacked together at their approximate locations, then removed and welded. Pieces were turned and threaded to allow both left and right sides to be removable independently. Once these parts were fabricated, I needed to wait for the sidecar to arrive.
 |
Again, the right side but with the frame welded up and bolted together. |
The time Champion projected until the sidecar was to be delivered was four weeks. After many phone calls they actually achieved it in nine weeks. The closest delivery point was in Greeley so I drove my pick-up out to get it. When I arrived at the loading dock, I found the crate was a little too big to fit in the truck and found myself taking apart the ladder rack to get the crate in.
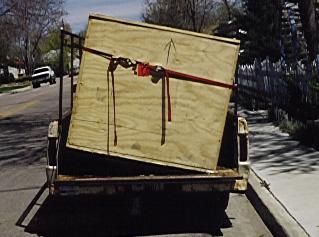 |
To give an idea of just how big the crate really was, not only would it not fit very well in the back of my truck but also my daughter made a clubhouse out of it. |
The main order of the day was to get the sidecar uncrated and set on jacks so measurements could be taken. It was a struggle but with my wife’s help the sidecar was uncrated and placed on jacks in the garage before it was dark out.
Next morning found me out in the garage fiddling with the “universal” mounts Champion sent out with the sidecar. After about an hour or so I pitched those universal mounts back into their box (where they reside today) and started from scratch. Out of all the outfits I have owned and ridden, the mounts between the bike and sidecar decided whether or not you ever wanted to take the sidecar off. Never have I been able to remove a sidecar and bolt it straight back on without something going a miss. Knowing that no matter how I tried, this outfit wasn’t going to be any different but I had to try. First off I wanted it to be easy to get on and off, next I wanted it to be quick, finally I wanted it to be in as close to the original position as possible after the off and on process was complete. What I went for was simplicity. Four bolts on, four bolts off. Solidly held mounts, nothing moves.
 |
I made the main mounts on the sidecar not only strong but also easy to work with. No clamps, no “U” bolts, nothing left to chance. |
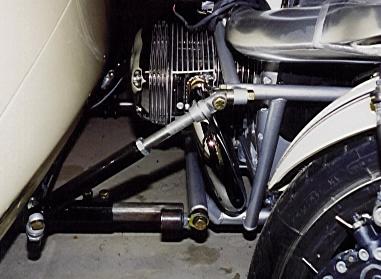
Keeping those items in mind, the lower mounts got under way. The mounts on the sidecar frame were fabricated from steel tube 1-1/2” OD with .190 wall. I still wanted to have some adjustment available so the threaded fittings (to suit 5/8” rod ends) were offset 1-1/2” front and 3” on the rear. To keep things simple as well as stout, I cut tubing a suitable length to fit snugly between the rod ends. By setting both the sidecar and motorcycle in the “use” positions, I could now take several measurements for locating my newly made mounting tube. On the bottom of the engine there are several threaded holes available, these were put to good use with washers, spacers and bolts to hold the mounting tube in position while other stronger mounts were fabricated.
 |
The mounting tube being held in place with a piece of flat steel stock, just for location purposes. |
 |
With the main tube being held in position, stronger mounts will now be fabricated. |
 |
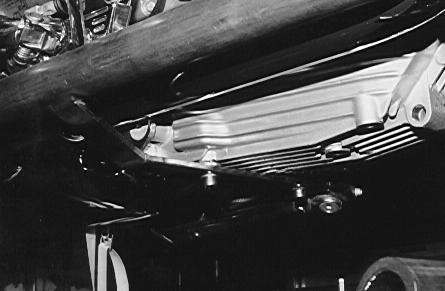
Main tube mounting at the service stand holes below the muffler. |
 |
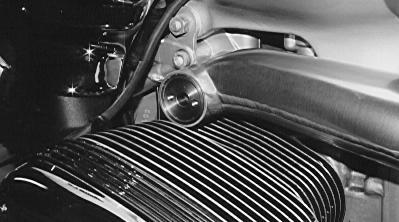
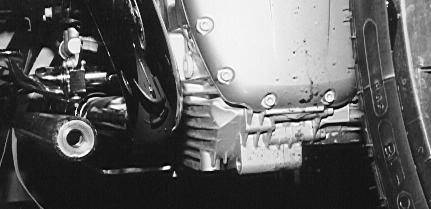
Even after mounting at the front of the engine case, just for a little extra safety, I also mounted to the threaded hole by the oil filter. |
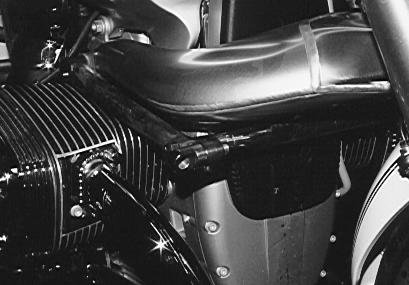
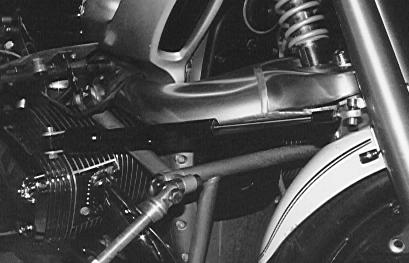
The rear fitting of the mount tube was located at the holes that were used for the service stand at the rear of the engine at both sides. Fitting a mount to the front of the engine proved a little trickier. I wanted to use the through hole on the bottom of the engine that BMW mounts their safety bars to but the hole wasn’t just one size. On one side, the hole was 12mm and on the other side it was 11mm. To cure this problem, I turned a sleeve that held both sizes but allowed the full-length support of a 10mm bolt. For a little extra support, the 8mm threaded hole by the oil filter was also utilized. To keep the upper and lower mounts from drifting away from each other, they were tied together with a length of ¾” pipe.
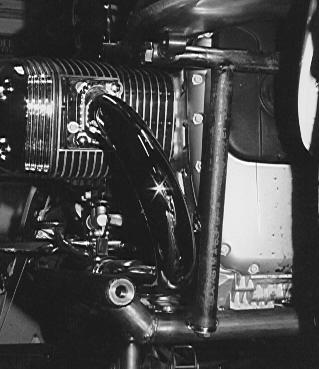 |
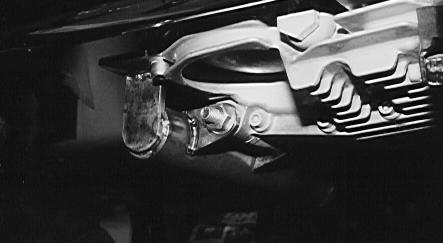
After welding up all the mounts, I added a length of pipe between the upper and lower mounts to stop any chance of the mounts wandering. |
The sidecar was then fitted and removed several times and adjustments made until I was happy with the location of all the mounts. At this point, the mounts were removed and sprayed to match the motorcycles rear frame. With the mounts seemingly out of the way, it was now time to prepare the motorcycles systems to accommodate the sidecar.
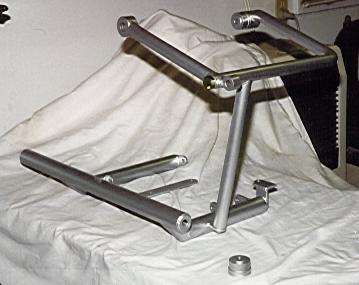 |
This shows the assembled mounts (off the bike of course) just after painting to suit the rear frame. I will probably put them on and take them off a couple more times before I’m satisfied enough to have them powder coated. |
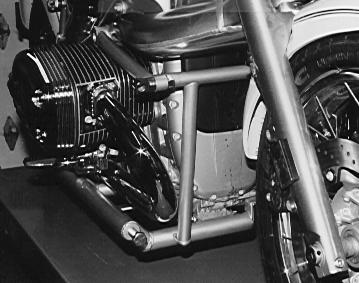 |
Mounting frame back on the bike, ready for the sidecar |
The sidecar came with a rather large wire harness that needed to attach to the motorcycle, so off came the seat, tank and anything else that seemed to be in the way. I laid the harness in its approximate position then separated the clumps of wire according to its job. Once all the locations were found and fastened, the whole harness was wrapped with friction tape to closely match the bike’s original harness. Again the sidecar was fitted to check electrical function. While the gas tank was still off, I went ahead and attached the hoses and fittings to the sidecar brake.
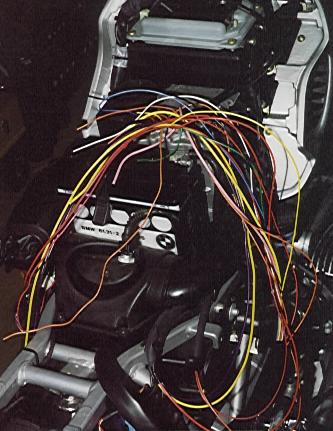 |
I love wiring, it all starts off looking like nothing but a jumble of color, but after only a few minutes it all makes sense. |
 |
Sidecar mounted up, electrical plugged in, sidecar brake tied in. Looks like all systems are a go! |
This is where things started to get a bit exciting. Seeing the rig all together made me want to take it for a ride. The tank, seat and covers were all fitted and I pottered off down the back alley. The bike ran well, just like I expected but the front end wasn’t happy.
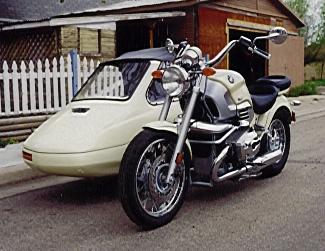 |
The first ride! |
A steering damper needed to be fitted. The steering damper unit was procured from Lowell Neff in Arizona, as for the mounts, I was on my own. My first attempt at making a mount for the steering damper ended with a very pretty but unusable lump of metal. Second go didn’t have the look of the first but at least it worked.
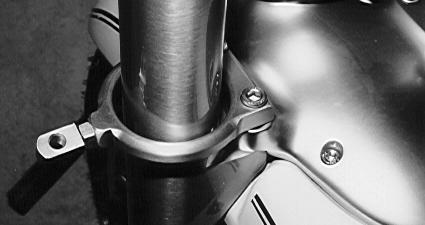 |
This is the first attempt at mounting the steering damper, pretty huh? Too bad it didn’t work I still hold onto this part only because I feel it’s just too nice to throw away. |
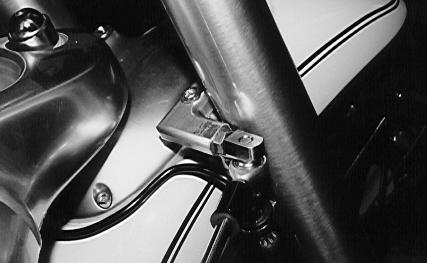 |
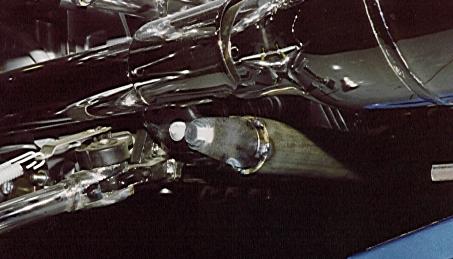
This is the damper mount that is on James now, not quite as pretty but works great. |
 |
Ok, so it’s not real clear but if you look real close this photo shows the whole steering damper and it’s mounts. |
Before going out for another ride I fitted the rear wheel with a metric car tire (165R-15) to put a little more patch on the road. The next ride was an absolute dream, bike and car behaved flawlessly! The only complaint I arrived back home with was the front brake was way too squishy. In a moment of need, I could easily pull the lever to the bar before the outfit would stop. Removing the right front brake caliper cured this problem. As luck would have it, I had squirreled away some old brake fittings one of which was modified to plug the hole left by the vacant caliper.
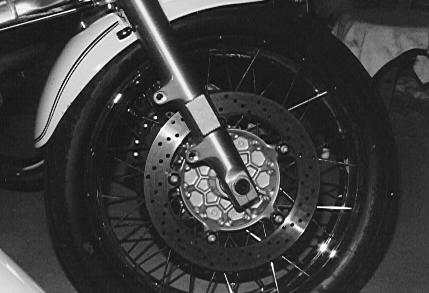 |
The front wheel with the right caliper removed. |
Bigger, stronger and faster than any of my previous rigs, James really is a treat to ride. Yes, I really do think I’ve built the perfect beast.