
Pokie, January 2000
I’m going to make an attempt at helping folks work on their trusty mounts. Simple service work shouldn’t scare people, it’s actually kind of important that you at least have an idea of what goes on at the dealer. I’m not much of a writer, but I hope you can put-up with me.
Something to think about before trying to work on your bike, do you want to make it an enjoyable experience? If so, start by identifying the areas on the bike you will be laying hands and clean them. I usually start a service on my bike with a right good bath, (bike, not me).
Safety whilst working on your bike is also something to think about. The bike should be held in a good, safe position with little chance of movement. An upright position is definitely preferred, so, if you picture yourself doing a lot of the service work on your bike, you may want to putout for the BMW service “center stand”. A service center stand isn’t really necessary, but it sure makes life easier.
|
Eccch, what a dirty pig! |
A lot of times after we wash our bikes, we manage to miss the under side. If you do elect to work on your own bike, you are going to get real used to looking at its underbelly. You are also going to get real used to cleaning off the dirty, oily guck that collects under there.
To clean off any or all of said guck, I like to use a product like Gunk or SS100 while washing the rest of the bike. For the spots I miss or overlook, I’ll simply brush on some solvent or paint thinner. The cleaner it is around the drain and filler plugs, the less likely any foreign material will be able to get in. With only about 2 minutes cleaning with a small paintbrush and less than a cup of paint thinner, the job has been made so much more enjoyable.
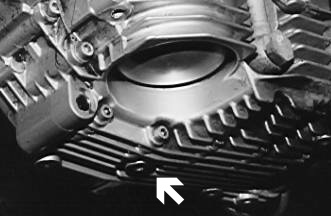 |
Now that the bottom side is clean, the location of the drain plug can be noted. |
After placing an oil drain pan, (capable of holding at least 4 quarts) under the engine, break the drain plug loose. The engine requires an 8mm hex key. Instead, I use an 8mm hex key socket with a 3/8” breaker bar. Remember now, “lefty loosy, righty tighty”. In other words, looking at the drain plug, turn it anti-clockwise.
 |
Tools for changing the engine oil and filter. |
Once the engine drain plug is “broken” loose, remove the socket from the breaker bar. Use the socket in your fingers to unscrew the drain plug. Try to get as little dirty oil on your hands as possible when removing the drain plug, the carcinogens in dirty oil can enter your body through your skin. You may want to consider using mechanics gloves or Nitrile gloves to keep the carcinogens at bay, besides, they help keep your hands from looking so gross.
Whilst the engine oil is draining, let’s get the oil filter out. To remove the oil filter, I use a 3/8” ratchet with a BMW oil filter wrench (socket). When removing the oil filter, ease it counter clockwise. Don’t try to “snap” it loose! If you try to snap loose an oil filter, the “o ring” on the sealing edge will absorb the shock and cause the wrench to round the corners on the filter body. Producing more problems than it’s worth.
Oil Choice |
| A lot of questions are raised about what kind of oil to use. Everyone has an opinion on this one. I use a name brand engine oil of the viscosity suitable for the time of year. I use 20-50 for late spring, summer, and early fall. Then for late fall, winter and early spring, a 10-30 is a good choice. As for synthetic oils, they are fine to use as long as you use them after your engine has run-in for 10K miles or more. Just remeber, when changing the type or viscosity of oil, change your filter too. |
While the old filter is draining into the “dirty oil” jug, break out a new filter and start filling it with new oil. Putting on a new filter without filling it first will cause the main bearings to run dry until the oil pump fills the filter, …eventually causing premature bearing failure.
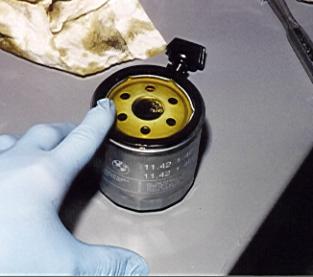 |
Once the oil filter is full, don't forget to smear the seal ring with oil. |
After the filter is full, wait for it to burp out any air pockets. Dip the tip of your finger in the new oil and smear a coat of oil on the filter’s sealing rubber “o” ring. This will not only help the sealing, but will make it much easier to remove the oil filter next time. Slide the filter up the filter tunnel and thread it on by hand. When the filter feels like it has come against the engine block, tighten the oil filter only about another ½ turn. That is as tight as the filter needs to be.
Fit a new crush ring to the engine drain plug and thread it back into the bottom of the sump. When the plug is threaded all the way to touching the sump, use the 8mm hex key to snug it down (approximately a 1/3 turn).
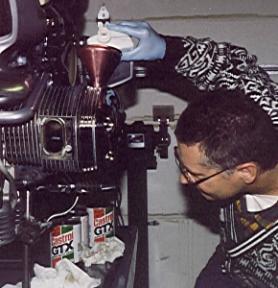 |
Watching the oil level come up. |
To refill the engine, remove the filler plug (left-hand valve cover). Set in a nice clean funnel and pour in three quarts of oil. Wait just a minute then note where it is showing on the oil window (below the left-hand cylinder). Adding a little at a time, fill the level to the top of the window.
If it is safe to start the engine, do so. Run the engine for two or three seconds then shut it down. Wait a bit, then check the oil level in the window, the level will probably be close to the bottom. Top up the engine oil so it is again at the top and call it good. Remember to only check the engine oil level with the motorcycle in the bolt upright position. Changing the engine oil and filter will use pretty darned close to 4 quarts of oil.
If you did okay changing the engine oil, how about if we just keep going? Let’s change the oil in the transmission and rear drive.
Magnetic Drain Plugs |
| Over time, a certain amount of ground-up metal bits will collect on your magnetic drain plugs. This is not unusual; just wipe the goop off with a bit of tissue or a dirty rag befor re-inserting the drain plug. If you find "chunks" of mettal on the magnetic drain plug, preserve the pieces in a plastic bag and take them down to your BMW dealer to view. You and your dealer shoud discuss the action (if any) to be taken. |
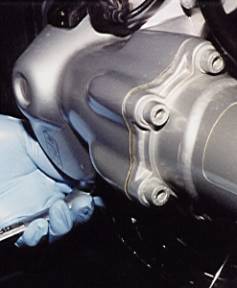
At the time my transmission oil was changed, I had the complete exhaust system off for warranty replacement. To remove the mufflers wasn’t such a bad job, I may even opt to remove them when it is time to change the transmission oil again. Seems to me, if you don’t want to remove the mufflers to change the transmission oil, you are going to have to be a little creative. If you use a 14mm hex key, shortening the short end will probably be required to get in the small space available. To get enough leverage to break the drain plug loose, a bar slid over the long end of the hex key may be necessary. To use a ratcheting tool, a short piece, (about 1” long) of the 14mm hex key will have to be cut off. After cleaning up the cut, use this short piece in conjunction with a 14mm ratcheting box end wrench, (this may have to be lengthened to have enough leverage).
With the mufflers off, there is unlimited access to the transmission drain plug. A tool to open the drain plug still had to be obtained. A 14mm hex key is considered to be a little unusual, so, you won’t find one at the usual tool stores. Import auto stores will be willing to order one, if you won’t mind waiting a day or two (I found my local Ace Hardware has them). Tool trucks like Proto, Mac or Snap-On usually have 14mm in both hex key and hex key socket form. The hex key sockets will only be of value to you if you have removed the mufflers.
If your mufflers are on (and why wouldn't they be) easy access is gained by loosening the muffler clamp and rotating it. With the clamp rotated, access is gained with a long extension. I have also had good success with a very short piece of hex key in a short socket and breaker bar (working above the exhaust pipe).
 |
The peice I cut off of my 14mm hex key coupled with a 14mm socket. |
I bought a 14mm hex key from the now de-funked Big A Auto. Because of the large amount of room at present, (with the mufflers off) I opted to cut 1 inch from the long end of the hex key. After cleaning up the cut, a 14mm, ½” drive socket was mated up with the 1” piece, and a wrench was formed. Added to this was a short ½” extension and a ½” ratchet, making short work of the transmission drain plug.
 |
Clamping up an old magazine cover to direct the oil to the drain pan. |
Upon breaking loose the transmission drain plug, make sure a drain pan capable of holding about 2 quarts of oil is properly placed underneath. Weather you pull your mufflers or not, it may be a good suggestion to protect any possible “drip” areas with an old magazine page held by a pair of hemostat pliers. The page will not only protect the parts from oil, but will also help direct the oil to your waiting drip pan.
With the transmission, it’s always a good idea to remove the drain plug first, then the filler. If the previous mechanic overfilled the transmission or if there is a build-up of pressure, (blocked vent) opening the drain first will avoid any unnecessary clean-ups. While the transmission is draining, use an 8mm hex key to remove the filler plug.
When the transmission seems fully drained, refit the drain plug. The drain plug on the 1200c uses no crush ring and this bothers me a bit. I can’t help but feel that after time, the sealing surface on the transmission case (being aluminum) will gall. For me to feel better about this situation, I’ve fitted a dipstick crush ring from a /5, /6, or /7 to the transmission drain plug before putting it back in. If you follow my lead and fit a crush ring, thread in the drain plug with your fingers until it comes against the crush ring. Now tighten the drain plug about another ¼ turn. If you opt to refit the drain plug without a crush ring, you probably won’t be able to tighten the drain plug any more than about 1/8 of a turn.
 |
Filling the transmission. |
Fill your transmission to the filler hole with clean Hypoid B gear oil. Before filling, consider the time of year. I would suggest viscosities of 80-90 multi-grade for fall, winter and early spring. Saving 90-140 multi-grade for late spring, summer and early fall. The transmission can be changed to synthetic oil at any time, if you so desire.
Once the transmission has been filled to the top, fit a new crush ring to the filler plug and thread it in. Again, adding about ¼ to 1/3 of a turn to tighten.
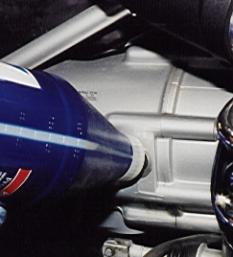
Changing the rear drive oil is really straightforward. Place a pan (capable of holding about ½ quart) under your rear drive. Break the drain plug loose and remove it fully. While the oil is draining, remove the filler plug. To remove the drain plug, you will need a 19mm box end wrench or 19mm socket and ratchet. The filler plug will require a 6 mm hex key or a 6 mm hex key socket and ratchet.
 |
Removing the rear drive drain plug. |
Allow the rear drive to fully drain. Refit the drain plug (after cleaning) with a new crush ring and tighten a 1/4 to 1/3 turn. Refill the rear drive with the same oil you used to refill the transmission. The rear drive will fill a little slow and will require topping-up a couple of times before you are done. Just fill a bit, wait a few seconds, then fill again. When the level stabilizes at the bottom of the filler hole, you’re done. Refit the filler plug with a new crush ring and tighten 1/4 to 1/3 a turn.
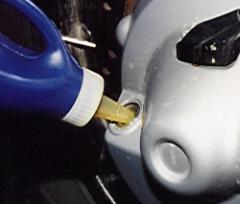 |
Topping up the rear drive. |
Ready for a ride?
Copyright © 2009 Pokie Parmidge