
Shift linkage
Pokie Parmidge
January 2004
The shift linkage isn't real easy to see, the way it hides behind and below the starter motor. This is also the reason it doesn't get much attention--it's not real obvious. As the shifting linkage gets dry, dirty or loose, the transmission just won't shift properly. The only way to cure shifting problems is tobite the bullet and pull the whole works out to clean and grease it. The shifting on my R1200c was getting, well, mysterious and this is what I did about it.
First thing that is in the way is the starter cover. The starter cover may feel loose but that's because it is rubber mounted and won't come off until the bolt in the back is removed (it's not easy to see, but it's back there). I tried to take a photo of the bolts location but I just couldn't get in there.
|
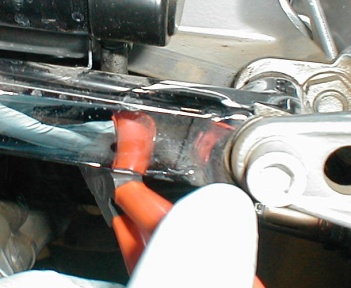
I used a 5mm hex key socket with a long extension on my ratchet (as seen in the photo) to extract the cover bolt. |
Once the bolt retaining the starter cover was out (yes there's only one), I next removed the hoses from the rubber ring on the rear of the cover. To get the cover out isn't real easy as there's not a lot of room around it. I slid the cover back (off its pins), rotated the top of the cover towards me then slid it forward and out. One of the rubber bushings didn't come out with the cover so I had to go after it. After picking it out of the hole in the transmission case, I pushed it back on its pin.
The top and bottom mounts of the adjuster link are ball and socket attachments. The socket snaps onto the ball with a little spring clip that stays in the socket, the socket is then locked onto the ball with a retaining pin. The retaining pin has to be removed to get the socket off, only problem here is the pin is really hard to see. The bottom of the pin is bent into an arc that snaps around the bottom of the ball socket. To get the pin out, the pin has to be unclipped from around the socket, rotated out into the open and then slid out.
 |
The ball socket at the top of the adjuster link with its locking pin unclipped and rotated. |
 |
Once the locking pin has been rotated, it can be pulled out with a pair of needle nosed pliers. |
To get the ball socket off the ball, I used a small heel bar to pry it off.
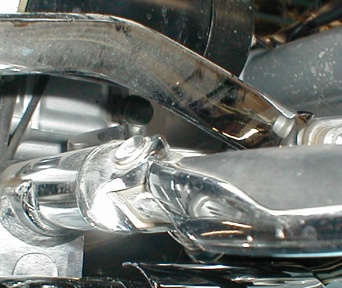 |
It's hard to see, but if you look just above the footpeg mount and below the shifter, you'll see a dark circle. That's the ball socket. Just to the left, you'll see the head of my heel bar ready to pop off the socket. |
Once the ball socket is popped off, the shifter will drop against the footpeg. The only thing holding the shift linkage and the shifter arm on is the shift arm pivot bolt. Using an 8mm hex key socket, I backed out the shift arm pivot bolt (counter clockwise). The bolt undid ok but it has a long shaft beyond the threads so I still had to pull the bolt out while supporting the shifter pedal.
 |
Removing the shift lever pivot bolt. In the upper left of the photo, note the adjuster link dangling. |
There is a shim in the near side of the shifter pivot that only became obvious while I was lifting out the shifter arm. To get the shifter out I had to tip the shifter up in the back and lift it out with the linkage attached.
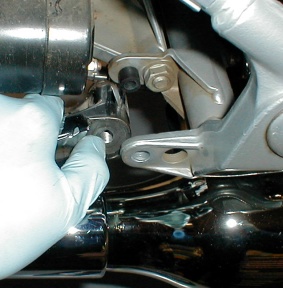 |
Holding my thumb on the shim while lifting the shifter out. |
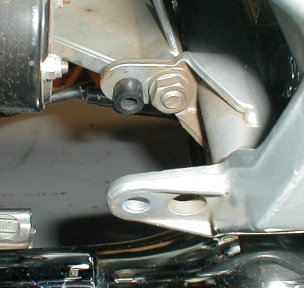
With the shifter out, I then wiggled out the black plastic bushing from the frame (the black plastic bushing behind the shifter can be seen in the photo above) to check for wear or damage.
After cleaning and smearing some grease inside the black plastic bushing, I pressed it back into its place in the frame.
 |
Black plastic bushing back in (before I had a chance to lose it). |
Next thing I did was to clean and inspect all the parts of the shifter linkage. It's a good thing I checked my linkage when I did, the ball that was attached to the shifter arm had come loose and was only a couple of miles from falling off! That would have been exciting, riding home without being able to shift.
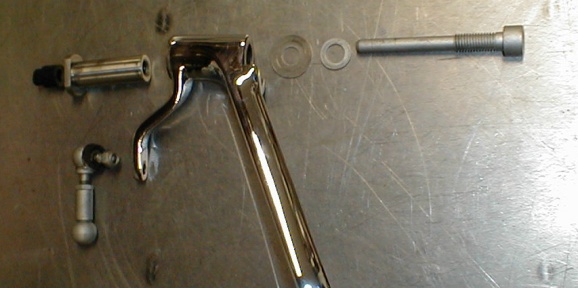 |
All the parts of the shift linkage cleaned and laid out. |
If I needed to adjust the pedal for its location, the adjuster is between the two sockets as seen below. To adjust the pedal up, make the space between the two sockets smaller. To adjust the pedal down, increase the space. I liked mine right where it is (which is the way it came stock) the space between the socket and the lock nut when tight is .259 of an inch.
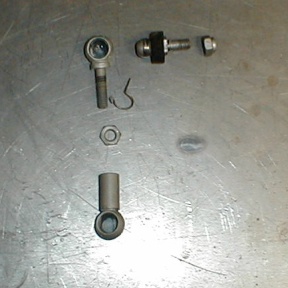 |
The pedal height adjuster all apart. The ball on the top right is the one attached to the shift lever and the one I almost lost the nut for. To the right of the upper ball socket is the locking pin. |
After cleaning, I put a couple of drops of oil on the foam ring of the attachment ball to help keep dirt out. Greased the inside of both ball sockets, threaded the ball onto the shift lever (with the addition of a lock washer). Assembled the adjuster to my liking and snapped it onto the shift lever ball.
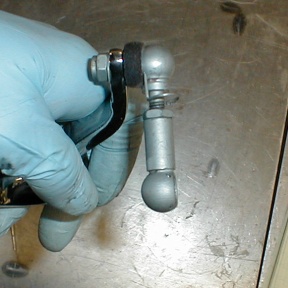 |
The adjuster snapped onto the ball, just sliding in the locking pin. Once the pin is all the way in, the curved portion is then rotated and snapped into the groove seen just below the ball socket. |
Before greasing the shift lever pivot pin, I checked the two clear plastic bushings inside the shift lever for gauling or damage. I then slid in the pivot pin to check that it wasn't tight or too sloppy. I felt good about the fit (it didn't need new bushings) so I removed the pivot pin and smeared it with grease and also smeared the bushings. Slipped the shift lever pivot into the shift lever (enters from the rear or backside). Wiped off any excess grease that oozed out, then wiped off the ball at the transmission and coated it with grease. Daubed a bit of grease into the ball socket (remembered to put a couple of drops of oil on the foam ring) refit the shim and slid the shift lever back into place. I then smeared grease on the pivot bolt and threaded it in, held the pivot bushing with a 19mm open end wrench and tightened the pivot bolt (30 foot pounds).
After tightening the pivot bolt, I wiggled the lever up and down to make sure there was no binding. Snapped the linkage socket back onto the transmission ball, slid in the locking pin and snapped it into place around the base of the ball socket. With the hard part out of the way, I slid the starter cover back in and pressed its rubber bushings home. Threaded in the starter cover bolt and tightened it (5 foot pounds). Fed the hoses back through the rubber loop on the back of the starter cover and called it done!
Copyright © 2009 Pokie Parmidge