Ignition Timing
Pokie Parmidge
February 2004
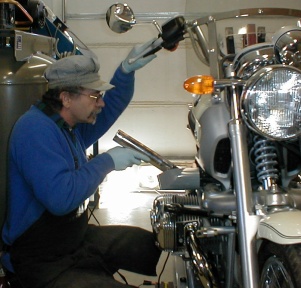
After repairing the oil leak on James's timing cover, I wanted to be sure I haden't messed up the ignition timing. The ignition timing can be checked and adjusted pretty easily on a Cruiser, here's how I did mine.
I started off with holding the bike in an upright position. I don't think it's all that necessary to have the bike perfectly upright to check the timing, mostly just to make sure it can't roll while it's being worked on. Remember now, working on a running or hot bike means being really careful that skin, clothing or other items don't contact the hot exhaust pipes.
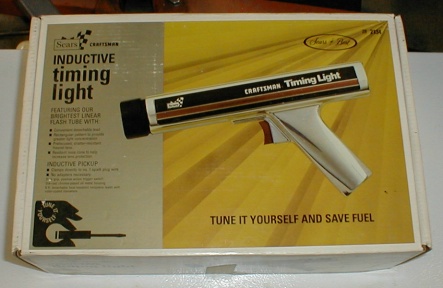
My timing light is kind of dated but works as good as the day I bought it. Whenever I'm finished using it, I wipe it down and tuck it back in it's box for protection. I bought my inductive timing light at Sears about twenty five years ago.
|
My timing light in the box it came in twenty five years ago. |
An inductive timing light needs a 12 volt power source. Rather than trying to hook it to the bikes battery, I keep an old battery just for this purpose. So when your bike needs a new battery, you might consider keeping the old one as a test battery. An inductive timing light uses an inductive pick up that clamps around the ignition wire so no need to do anything more than simply clamp it on and hook it to a 12 volt power supply.
In preperation to checking the timing, I'll next remove the right side chrome side panel to access the timing hole in the engine case. It's not really necessary to remove the spark plug cover from the valve cover, only to un-clip the H/T lead from it's clamp at the back of the head to give a little more working slop in the wire.
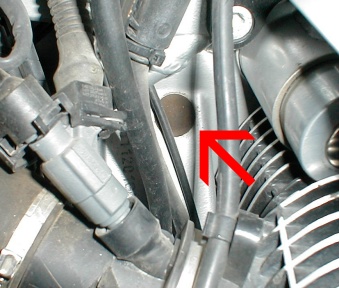 |
The black plastic timing hole plug. |
Removing the timing plug isn't hard, I just use a long spade screw driver to pop it out. Next I'll move my test battery into place beside the bike right below where I'll be working for easy access to the timing light. Plug the wires into the timing light, hook up the battery then clip the inductive clamp onto the H/T lead (spark plug wire).
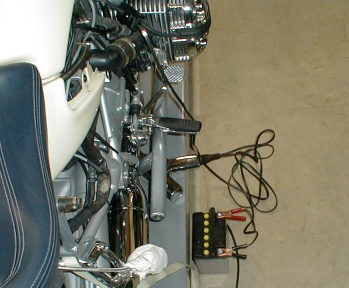 |
Timing light and external battery ready for action. |
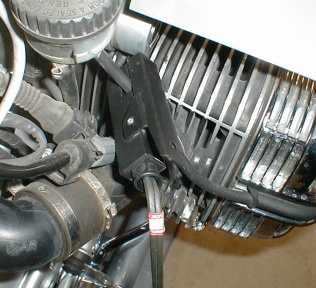 |
The inductive pickup clamped on to the H/T lead. |
I was going to be checking my bikes timing inside the garage, so at this point (before starting the engine) I opened the windows and set an exhaust fan in the back door (checking the timing isn't as important as having breathable air).
With everything in place, I started the engine. I allowed the engine to run for a few seconds to warm then picked up the timing light. I shone the light into the timing hole and at an idle the "S" mark on the flywheel was low in the hole. This meant that my timing was about two to three degrees advanced (just fine for my altitude). Had the "S" mark been high in the hole or not apearing until the engine was revved, an adjustment would have been necessary. I live above 6000 feet above sea level so it's good to having the timing advanced just a tad. From sea level to about 6000 feet above sea level the "S" mark on the flywheel should be fairly well centered in the timing hole at idle.
 |
Bike running, shining the timing light in the timing hole. The light behind is the exhaust fan in the bottom of the door. |
As the engine RPM increases (throttling up a bit) the "S" mark on the flywheel should move or dissappear down the bottom of the timing hole. I don't feel it's so important to prove how much the timing advances with engine speed, only that it does advance. The advance as well as how much it advances is controled by the electronic engine managment system. An ignition system that doesn't advance with engine speed will cause the engine to overheat and eventually lead to a catastropic failure.
If the timing needs adjustment;
The ignition pick-up is inside the front engine cover, to gain access, the horn and front cover will have to be removed. I started by using a 4mm hex key socket to remove the two upper front cover and horn mounting bolts. Lifted out the horn and uncliped the wireing by pinching the clip at the top of the horn plug. I then unscrewed the two lower bolts, lifted the cover off and slid it down and out. The adjustable timing plate is now visable under the crank pulley.
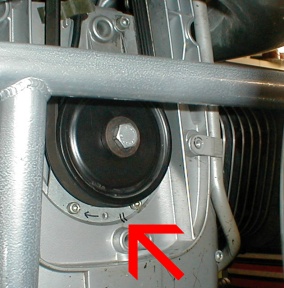 |
Excuse the sidecar mount, the timing plate is visable under the crank pulley. |
Before loosening anything, I marked the timing plate with two marks running from the plate to the engine case to give a starting point. I then marked the direction of rotation of the crank pulley on the plate (as seen in the above photo).
To adjust;
With each adjustment (no matter how small) the timing will have to be checked (motor running) to see if the results are as expected. Never try to adjust the timing with the motor running, always stop the motor, make adjustments then restart the motor to check the results. The timing is set when the "S" mark at idle is in the center of the hole.
Once it's been determined if the timing is advanced ("S" mark low or down the timing hole at idle) or retarded ("S" mark high in the hole or appearing only when the engine is revved) an adjustment in the opposite direction will be needed. By loosening the three bolts holding the timing plate in place, the plate can be rotated (this is where the arrow showing the direction of rotation comes in handy). If the timing is advanced, the timing plate will have to be rotated in the direction of engine rotation or the same direction as the arrow. If the timing is retarded, the plate will have to be rotated opposite the direction of rotation or opposite the arrow. Only move the plate a little bit at a time, snug down the three bolts holding the plate and check the timing. When the timing is set, recheck the tightness of the three bolts. It's good to recheck the timing once the bolts are tight to insure nothing moved.
All that's left is putting the cover and horn back on, putting the timing light away, re-fitting the H/T lead (into its clamp) and re-fitting the timing plug (I disslike putting that silly plug back in) and pressing the chrome side panel home.
That wasn't so hard now was it?
Copyright © 2009 Pokie Parmidge