by Pokie Parmidge 2012
On April 8, 1993 I bought a 1975 BMW R90/6 from Fred at BMW Fort Collins. Fred had told it's owner he would buy it "sight unseen" on two conditions, one, that it would make it to his shop under it's own power and two, if it had a clear Colorado title. The R90 and it's owner appeared a couple of hours later and Fred made good his offer to buy the bike.
Upon closer inspection, Fred decided the bike wasn't worth keeping, so, he called me. I drove up to Fort Collins to have a look at this "Pig Dog" as he called it. At the worst, maybe I could just part it out and maybe make a little money. The fact that it ran (although badly) and had a title, was enough for me to take the deal. With the paper-work out of the way, the Pig Dog was loaded up and brought home.
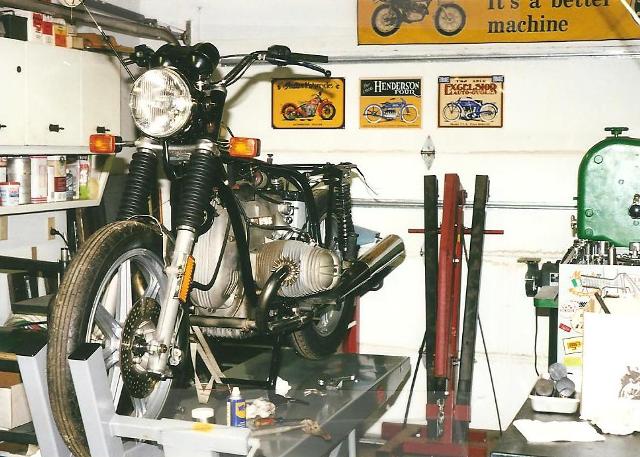
It was pretty obvious why Fred named this bike a Pig Dog, I've never seen a bike this dirty and neglected. I don't know if you can imagine just how dirty this bike was, it was leaking oil from every possible joint and because it was never cleaned, you couldn't even see the cylinder fins! Judging by all the items on the bike that were held together with glue, tape and bailing wire, it had a hard life. Before unloading the little piggy, I ran it over to the car-wash using up one whole can of Gunk and six dollars in change. A motorcycle started to appear.
|
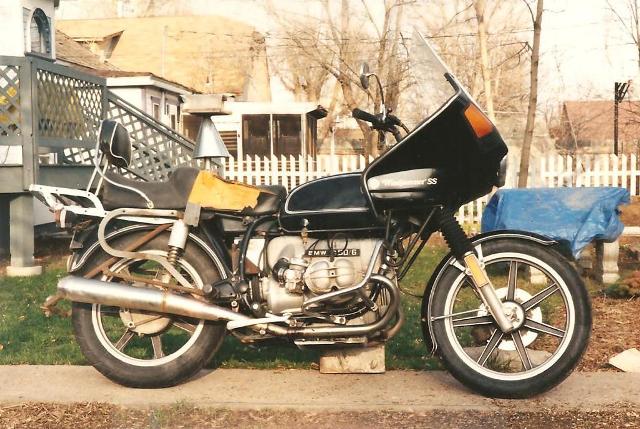
The Pig Dog after a lot of cleaning. A very sad motorcycle started to appear. |
Even after all that cleaning, I still wasn't convinced the bike was worth saving, I needed to see more. I started with pulling off all the crappy equipment, crash bars (that had been used more than once), fairing (split in two places), bag brackets and rack. Any parts that seemed useable were kept, all the other bits were deposited in Fred's dumpster. Once I was down to the basic bike, I pushed it into the garage to consider it's fate.
My consideration started with tearing down the bike. The battery wouldn't hold a charge, so it was tossed, the mufflers were rotted through, so they were also tossed. Even though I had cleaned the bike at the car-wash, the most time consuming part of tearing the bike down was cleaning. Mostly all I concerned myself with at this point was pulling down the engine. Because of poor cleaning and maintenance on the part of the previous owner, the inside of the motor was in quite bad shape. A lot of parts that usually wouldn't need replacing, had to be because of extreme overheating. Timing chain, sprockets, pistons, valves, crankshaft bearings,....... I'm sure you get the picture.
I was pretty sure I could do something with the engine once it was re-built, so I went ahead and re-built it. I didn't put in a new clutch or re-build the electrics yet, just in case I was able to sell the motor for a good price. The transmission was the next thing to tackle. Once inside the transmission, things didn't look all that bad, the usual bearings and bushings and that's about it. Turns out I had to replace the cluster shaft as one of the dogs was damaged, actually, I put the same shaft back in but with a new gear. These gears aren't available separately but I had saved another cluster shaft that had "other" damage that didn't involve the gear I needed. Ah, the value of having a good press and access to a metal lathe.
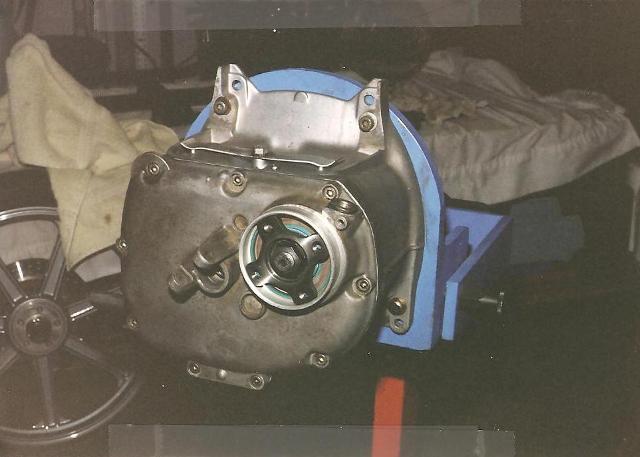 |
Transmission all buttoned up and ready to go. |
All the attention I've given to the engine and transmission got me thinking forward as to what to do with the rest of the bike, as there were still "unforseen" problems. Up till now I had been leaving the frame and forks together so there wouldn't be a bunch of loose parts laying around just dying to get lost. It was now time to start pulling them down as well.
One of the most neglected parts of bikes of this age are the wheel bearings and the Pig Dog was no exception. When it came time to remove the wheels, I had to get creative pulling the axles so as to not ruin the wheel hubs. The wheel bearings had been so badly neglected that they were "welded" to the axle. I had two options to remove the wheels, one was to cut the axles on each side and remove the wheels. The other option was to simply beat the axles out and ruin the wheel hubs. I didn't much care for either option, so I came up with a third. This third option was to make a collar to fit over the exposed portion of the axle between the wheel hub and the swing arm. This was achieved by making a collar then cutting it in half, place the two halves over the axle and holding them in place with hose clamps. I could now drift out the axle without harming the hub.
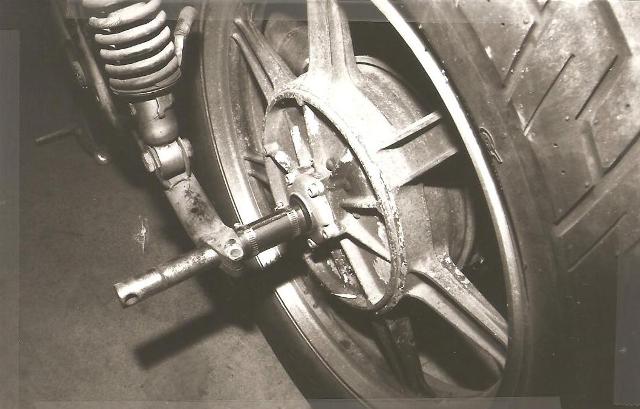 |
With the spacer held in place, the axle could be drifted out. |
Now that both wheels were off, I could inspect their condition. The Pig Dog came with both Lester front and rear wheels. Lester wheels were an after market wheel option, a good stout alternative to expensive BMW wheels. I can only speculate as to why the wheels were replaced but by the condition of these wheels, I'd say the wheels were replaced because the original wheels were damaged beyond repair by neglect. Both wheels were blasted, powder coated silver, bearings rebuilt, new drive spline fitted, new tires fitted and readied for action.
At this point in the "inspection" I decided the bike was getting too good to turn it into "parts for sale" and the Pig Dog was destined to rise from the ashes. Off came the forks, swing arm and sub-frame. All parts that were to be painted were stripped and readied for blasting and paint. The sub-frame had been broken and poorly repaired several times, so a fair amount of time was spent cutting out the bad repairs and bringing it back to "useable" condition. Needless to say the wiring would now have to be routed outside the sub-frame rather than through it. To make sure there would be no surprises, after all the parts were blasted, I went ahead and re-assembled them. Good thing I did as the center stand pivots needed to be re-made and tapped. The center stand had to have extensive repairs and the muffler mounts had to be replaced.
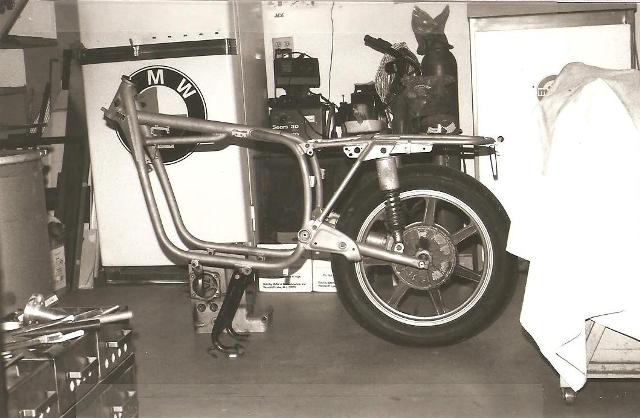 |
Everything blasted and bolted together to check for any problems. |
While the frame and assoicated parts were off to the powder coater, I was to tackle the forks next. I like working on forks, there's not much to go wrong here or so I thought. When I drained the oil from the forks, one side was dirty, the other side was not only dirty, the oil came out like black syrup. I guess that didn't surprise me all that much considering the shape of the rest of the bike. What did surprise me was when I pushed back the fork gaiters, the fork seals were just floating around on the tubes and not pressed into the lower legs. When I removed the gaiters, all became clear. Seems the old owner tried his hand at replacing the fork seals. When he couldn't figure out how to take the forks apart, he resorted to using a pipe wrench on each fork leg, causing gouges so deep that the seals bound to the fork tubes and were jerked out of the lower legs by the natural up and down action of the forks. A simple fork overhaul just got very expensive.
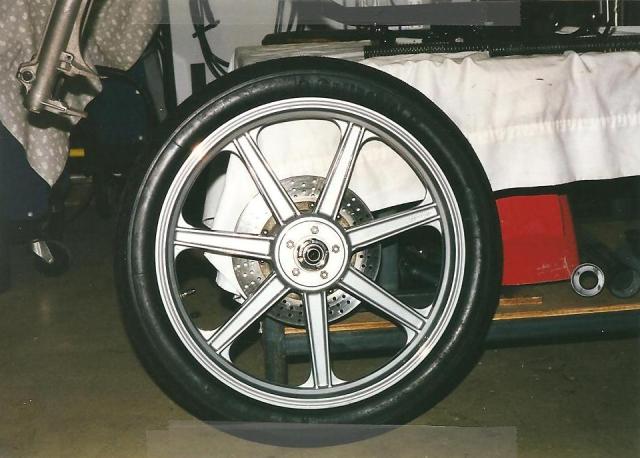 |
The finished front wheel, a preview of things to come. |
The last mechanical part to be dealt with is the rear drive. Considering all the disasters I've found so far, it was pleasantly surprising to find the rear drive worn but not "trashed". The drive splines were worn beyond use, so I sent out the crown gear to have the splines renewed. A couple of weeks later the crown gear was back with beautiful new splines. New bearings, seals and reshimmed, the rear drive was ready for use again.
Unlike everything else on this bike, the powder coating had no surprises, completed for the estimated price,..... before the due date! By the time the painted parts were back, all the mechanical work had been carried out. Now starts the assembly. With the forks and wheels back on, the frame can now be rolled around.
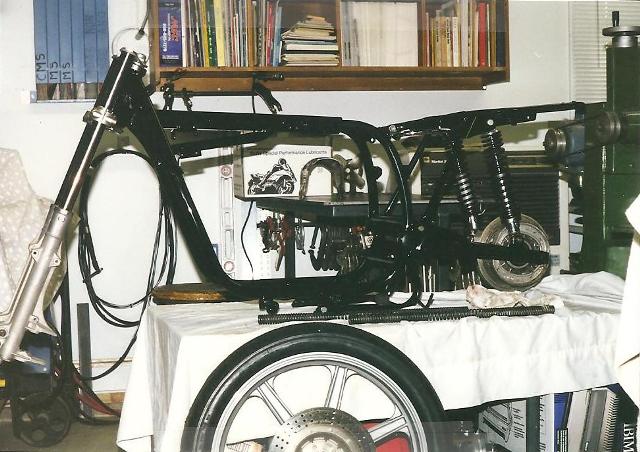 |
Parts back from the powder-coater and going together. |
The next step is putting in the engine and transmission. I'm not really looking forward to fitting the engine as I will likely need help. I prefer doing things myself rather than waiting for help, so maybe I just need to think a bit. I had the engine sitting on a little roll-around platform about 6 inches off the ground but needed to raise it to about 16 inches to be at frame height. I cured this by setting two scissor jacks at the height of the platform with a piece of plywood in between.
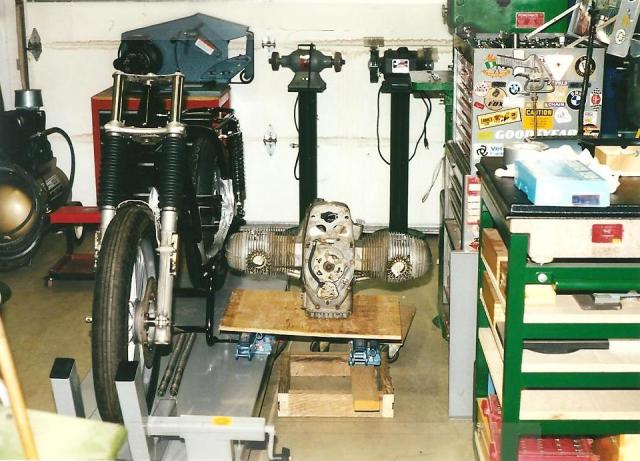 |
Motor going up to frame height. |
Slid the engine from the rolling platform to the plywood on the jacks then jacked both jacks up to the frame height. I then slid the engine close to the frame, layed my chest across the backbone of the frame and lifted the engine with my arms and set it in place between the frame tubes. From here, slid the motor forward in the frame, attached the transmission, slid the motor back, jacked it up, slid in the engine mounts,.... done! Presto, no strain at all.
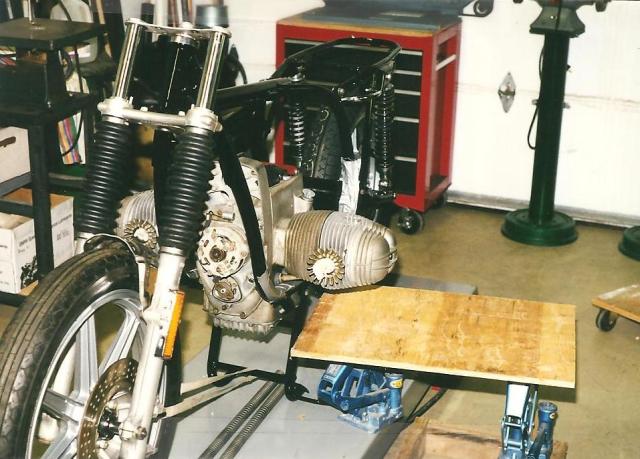 |
Motor back in the frame with no help and no strain! |
Next up, electrics and cables. New battery, new wire harness and rebuilt speedo/tach all ready to go on. I re-attached all the electrical parts to the frame. Hooked up all the units after testing. Wired up the head light, turn signals and handle bar switches and did the system test with the new battery fitted. So far, all is a-ok, no surprises. Fitted all the cables, attached the front brake hose, filled the brake reservior and bled the brake. The bike was now looking very complete, I love this stage! Not only is it looking complete, it looks new. I'm now thinking about the paint work on the tank and fenders.
 |
Mostly back together, I love this stage! |
Sorry, but the paint work is not always my favorite job, mind you, I also have to keep in mind this is the part that will make or break a restoration or rebuild. The tank looks pretty good except for a small dent and a bunch of paint chips. Lots of wet sanding and some filler should do the job. The fenders and battery covers are also pretty good, no big fiberglass repairs needed. Right now I'm off to the thrift store to pick up some bed sheets to cover everything up so I don't have to deal with the over-spray. I stopped by the paint store to look at chips. I settled on my favorite color, red. Not just any red, Porsche red. This will be my first time spraying enamel with a hardener and clear coat. I'm a little nervous but the lady at the paint shop put a lot of those worries to rest. Seeing as I was using a hardener, she suggested I not do a clear coat as the finish will be more than adequate on it's own.
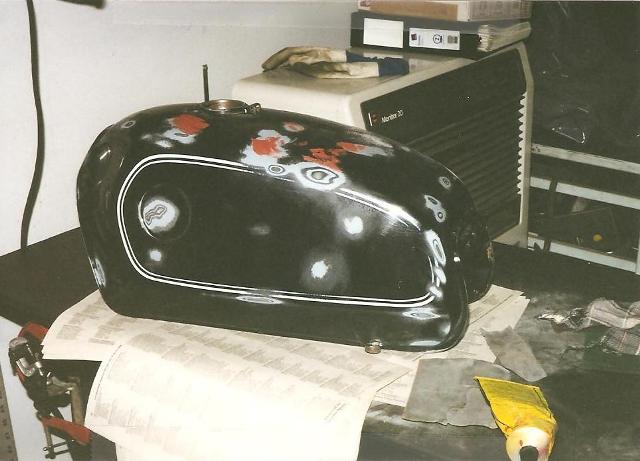 |
The gas tank starting to get attention. |
I'm so excited, I got the paint work completed today! I had a little trouble with the spray gun, so there're a few goobers I will need to wet sand and polish out. All in all, the paint work turned out pretty darned good. Gosh this is a pretty color. The fact that this bike is turning out so well, I felt it was time I changed Pig Dog's name to something more fitting. I settled on "Red". I really like this new name.
While the paint cures, I moved on to other necessities. The tool tray was broken so I bought a new one. The tool kit was fairly complete but a filthy mess. After about an hour of scrubbing on the old tool roll, I got it looking pretty good. I cleaned all the wrenches, lubed the pliers and replaced any tools that were too rusty or missing. With some digging around, I was able to come up with a rag, patch kit and manual to finish out the now "stock looking" contents of the tool tray. I did some trading with a friend and got a complete exhaust system, a little discolored but solid and quite usable.
At last it was time to start fitting the paint work. All new nuts and bolts were procured to finish out the "flawless" look that Red now wore. Using some mixing and matching, I was able to fit a nice looking tail light and rear turn signals. Any of the parts that were left over from the rear were deposited in the trash and believe me, that's where they belonged. The back of the rear fender was finished out with a nice, straight license plate holder and three new red reflectors, just like stock. The duel seat I had tucked away for Red was now looking way too scruffy to fit to such a nice bike. Instead, I fitted a solo seat I had been holding onto for several years. The solo seat had some rust problems, so I knew it wasn't a permanent solution. It was at this point I ordered a brand new dual seat. While waiting for the new seat, I discovered the master cylinder had started leaking and the brake light switch had stopped working. A rebuild kit sorted out the leak and a new switch sorted out the brake light.
 |
Painted parts going on. |
The moment of truth had now arrived. Did I do my job properly, had I addressed all of Red's problems, was the restoration worth while? Only one way to find out. Fuel was added to the fuel tank, no leaks. Fuel taps on, no leaks. Ignition on, choke,....... "Contact!" I had barely touched Red's starter button and Red was running! I only ran Red for a minute or so, made some crude carb adjustments then I was off for a test ride. Red didn't disappoint, the ride was of that of a new bike, perfect but tight.
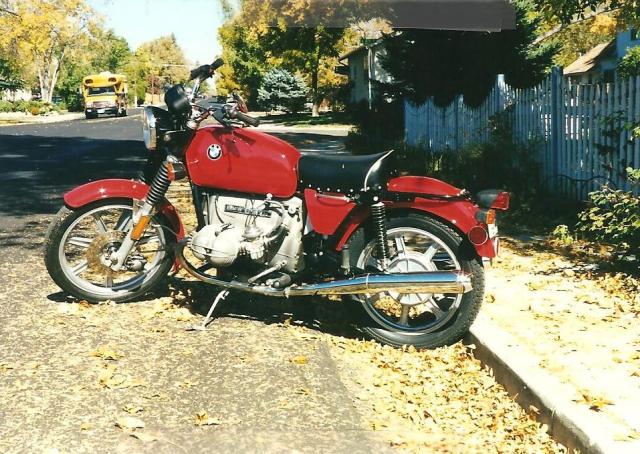 |
Red after the first ride.
Red rides again! |
When Red's new seat arrived, it wasn't packed very well. The trim on the back of the seat was squashed and one hinge was broken. I called the company that I ordered it from to complain about the poor packing job. They said replacing the seat would be no problem and to let them know when I had it packed for shipping. I tried several times to contact them again to no avail. I ended up unpacking the seat and repairing what I could and using it. Once the seat was on, stepping back it looked just fine. Not exactly the "cherry on top" I was hoping for but it still looked great!
I had barely finished Red when I got a call from an old friend in Washington state in need of a good bike. I didn't really want to sell Red but I did. Richard flew down here to ride Red home. I was sad to see Red leave. Red now has a new life, a better life, of that I am sure.
Copyright © 2012 Pokie Parmidge